


Easter is almost here, meaning it is time to dye your Easter eggs! Acrylic paint is the popular choice for decorating eggs, particularly because it is easy for children to apply. Although the results are aesthetically pleasing, the process isn’t 100% safe and if you’re intending to eat the eggs later, we suggest using natural dyeing methods.
The advantage of naturally colouring eggs is the natural tone. In fact, they tend to have less vibrant colours which means they look less synthetic. Other perks include the ability to control the intensity of the colours, as a result you’ll find a variation in pigment which will give a marble look to your eggs.
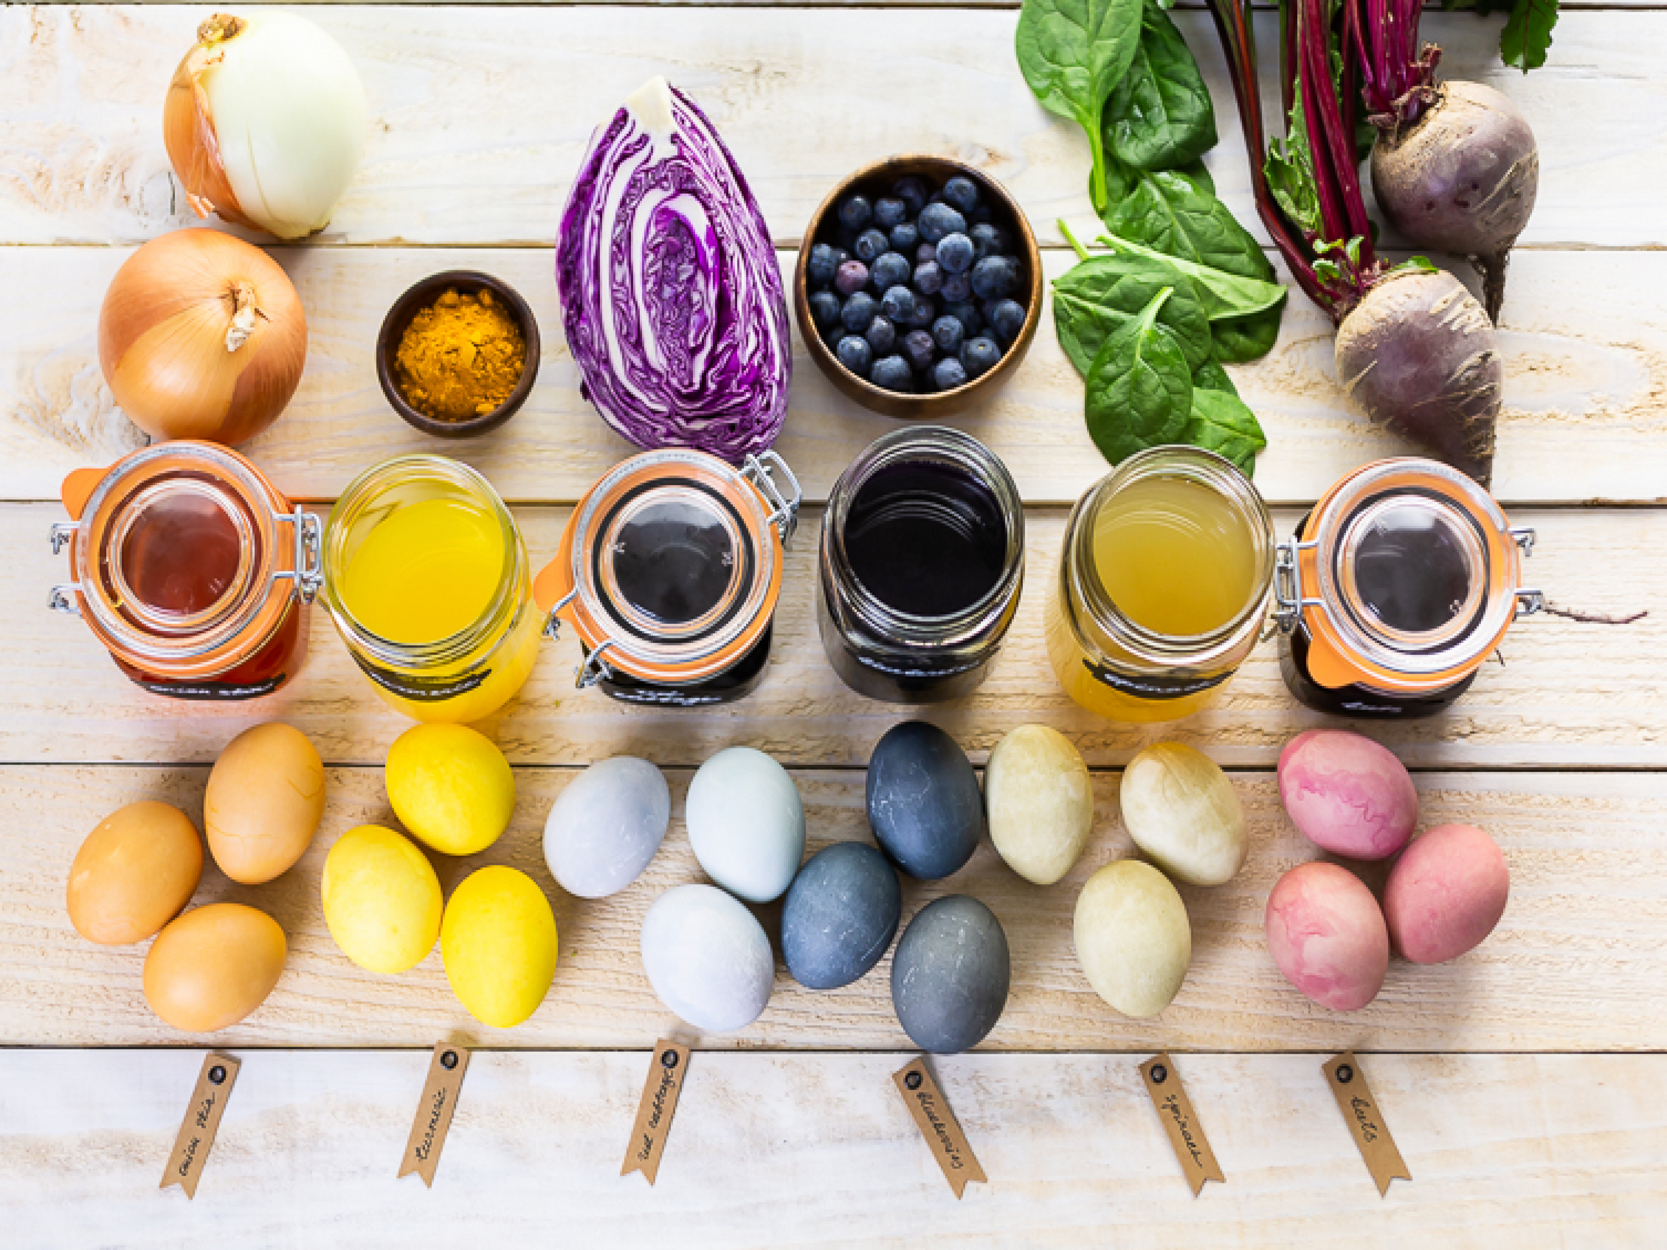
Here are the main steps to follow when dyeing your eggs:
- Combine 1 qt of water, 2 tbsp of white vinegar and 1 tbsp of salt in a medium pot
- Boil this mixture and add your ingredients (check list below) for your colour of choice, lower the temperature and let simmer for about 30 minutes
- Let cool and strain the dye to remove any fragments of food. Add the eggs to the strained dye and let them soak for about 30 minutes
- When reaching the preferred tone, carefully remove the eggs and pat until dry with paper towels
Here is the list of ingredients and the colours they correspond with, as well as some additional tips to complete the instructions above:
- Red or Dark Pink egg: 4 cups of chopped beets
- Orange egg: 4 cups yellow onion skins
- Light Orange egg: 4 tbsp of paprika
- Yellow egg: 3 tbsp of turmeric
- Light blue egg: 3 cups of chopped red or purple cabbage
- Dark blue egg: 4 cups of blueberries
- Green egg: 3 cups of chopped spinach
- Purple egg: Add the egg to a cup of red wine and let soak until reaching preferred tone
If you’re looking for other colour variations or want to experiment with designs, feel free to let the eggs soak for shorter/longer periods of time and try mixing ingredients to discover new tones.
Keep in mind that the final result may vary depending on the original egg colour, the dye will reach a darker tone if using brown eggs instead of white eggs.
The Bondi Wash team wishes you a Happy Easter!